I think this article might be the most important post I have ever made.
Let that sink in for a moment. I have been doing this for over 10 years, and have helped well over 100,000 people to get their DV greencard, but I am literally saying I have never created a more important post than this one.
I am certain that literally MILLIONS of people ruin their chances each year of being selected, and some get selected and then get denied because they did not make sensible decisions about this. And I am not exaggerating – the number is real, in DV2024 more than 70% of applications from the AF region were rejected even before the results were announced – so don’t fail in this way!
I am talking about the photo for the DV lottery entry. If you have any interest in entering the lottery, you should read this article slowly, pay attention, and follow the advice I am giving here. I will create a video with the same information so you can see me demonstrate the same concepts.
The government have certain requirements for the photo which I will explain below, and it is essential that you create photos that will not cause your application to be rejected. So – take these tips seriously.
First, a few common questions about the photo.
- Can I re-use an older photo, or one from a previous entry? NO – you must not do that!
- Do I have to have a professional photo taken? Not always, although some of you might be better off taking that option.
- Can I take a photo with my phone? Yes – phones these days have good quality cameras in them, perfectly suitable for the photos you need for the DV lottery entry.
- Can I edit the photo? This one is difficult. You must not alter your appearance in any way. However, it may be possible to edit the background of a photo as long as it does not change your appearance in any way. So – I would rather you did NOT edit the photo unless really necessary – so my examples and video explanation.
- Can I send my photo to you to check? No – Over 20 million people apply each year, so I do not have time to do that, so please don’t bother asking.
Now – what is an acceptable photo?
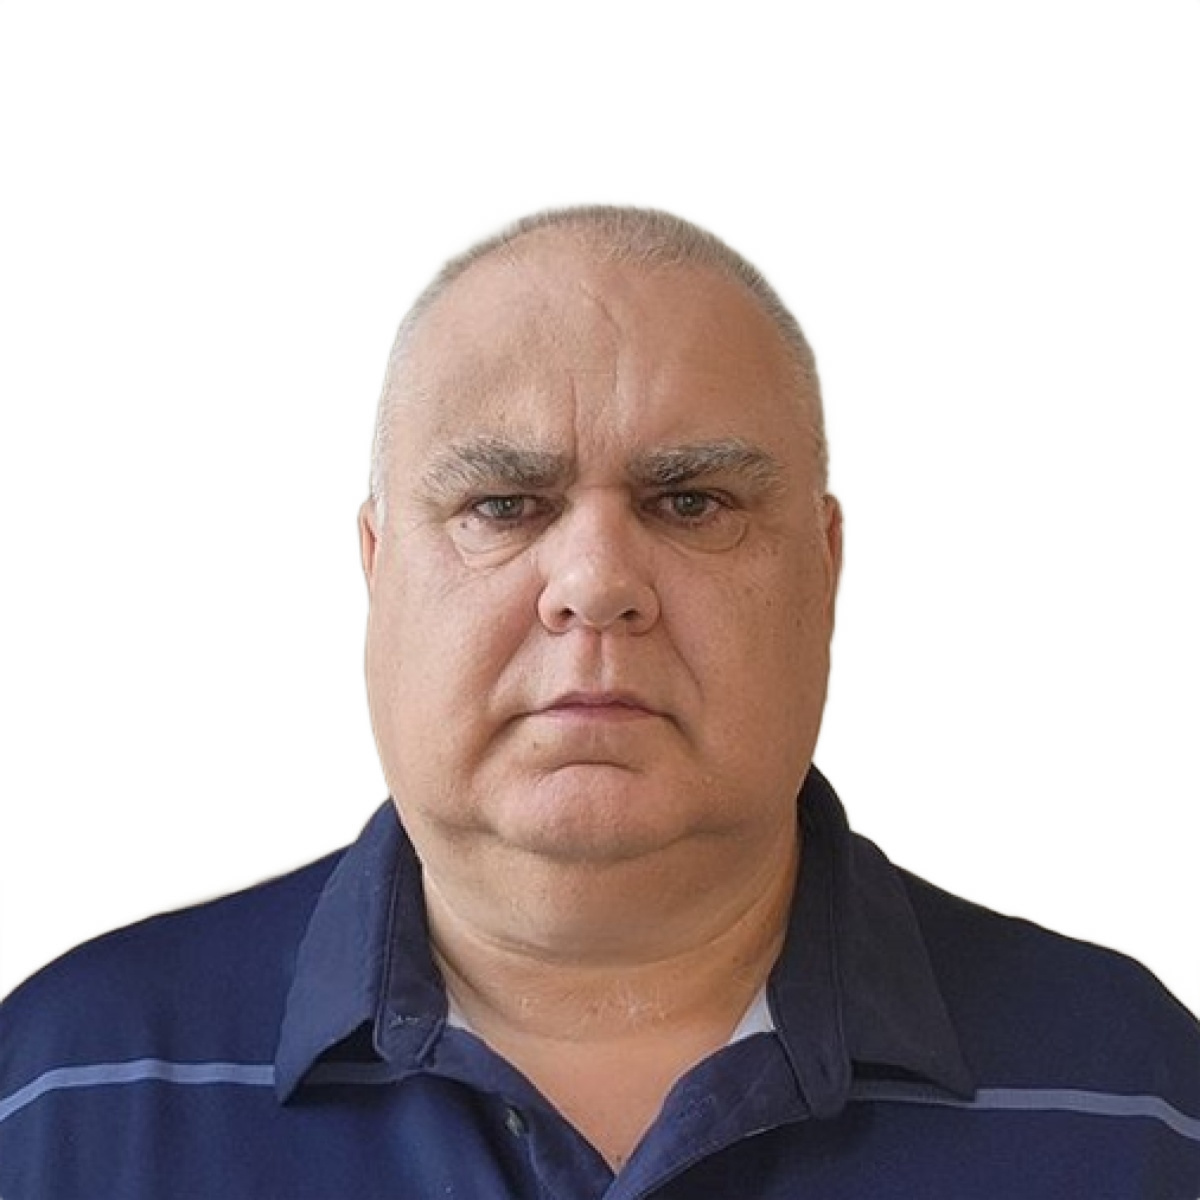
The photo below shows what you are trying to achieve. It meets the requirements as described in the official instructions which are linked here . The main features I want you to notice are that is is a head and shoulders photo, on a white background, with a neutral expression and no edits that have changed the appearance in any way. It is of the correct dimension (2 inch by 2 inch 600 pixels by 600 pixels).
Your photos or digital images must be:
- In color
- In focus
- Sized such that the head is between 1 inch and 1 3/8 inches (22 mm
and 35 mm) or 50 percent and 69 percent of the image’s total height from
the bottom of the chin to the top of the head. View the Photo Composition
Template for more size requirement details. - Taken within the last six months to reflect your current appearance
- Taken in front of a plain white or off-white background
- Taken in full-face view directly facing the camera
- With a neutral facial expression and both eyes open
- Taken in clothing that you normally wear on a daily basis
- Uniforms should not be worn in your photo, except religious clothing
that is worn daily. - Do not wear a hat or head covering that obscures the hair or hairline,
unless worn daily for a religious purpose. Your full face must be visible,
and the head covering must not cast any shadows on your face. - Headphones, wireless hands-free devices, or similar items are not
acceptable in your photo. - Do not wear eyeglasses.
- If you normally wear a hearing device or similar articles, they may be
worn in your photo.

You will need a photo like this for yourself, and for each person on the entry, including your spouse and each child. Remember, you will have to include every child that is under 21 and unmarried at the time of the DV entry. That includes your own biological children, adopted children and step children (aquired through marriage). These children must be included whether they live with you or not, and whether you intend to take them to the USA or not. So – make sure you can obtain a photo of each child, ready to do your application., and I advise you to name the digital files clearly so you don’t mix up one photo for another.
OK – so how to get a good photo. What is the best method?
Professional photo
The best way to get a perfect photo is by going to a professional photographer. Such a photographer will have a white background and have good studio lighting that will allow a photo to be used with NO manipulation or retouching in any way. However, this may not be possible for everyone, it might be inconvenient or expensive to get a professional photo. So, there are some other options.
Create your own photo – step by step
To create your own photo you need a device with a good camera or a digital camera. Whilst it is possible to scan an image from a printed photo, I would not recommend that. Depending on whether you have access to a clean white background you have some options available to you.
- Choose a location where to take the photo. It should have good natural light, if in sunlight, make sure the sun is not too strong. You might need to stand in shade to avoid squinting your eyes.
- Ideally be in front of a white plain background. There are some options to edit a background to be plain white as you will see in my video, BUT you will save time and money if you can use a plain white (or off-white) background.
- Ideally have someone else take the photo for you. Whilst you might be able to hold a phone yourself for a selfie, it is likely you will need arms like an Orangutan. You probably can’t hold the phone far enough away to get a good photo with a relaxed face on pose.
- Remove eyeglasses, hats and so on and be dresses in “normal” everyday clothes. No need to wear your Sunday best. No uniforms. Head coverings that are worn for religious reasons are OK.
- Look directly at the camera, no smiling, just a boring pose. If both your ears are showing then that means you have posed directly “face on” which is correct.
- Take the photo of you and each person who will be on your entry.
- Now, depending on whether you have a white background or not, your next step will vary:
- If you do not have a plain white or off-white background you should use an online service to edit the photo. You can use tools such as photoshop, but I find the online services are best. below and in my video I show how to use 2 such services – each of which charges a few dollars per photo. The photo they produce will have the right dimensions, the correct crop and a white background.
- If you did manage to get a plain white background you can save a few dollars for each photo because you can use the governments online tool which is free, and can crop a photo to the correct size and dimensions – BUT you should have a good quality photo with a white background. The government photo tool is linked here
Examples of online services
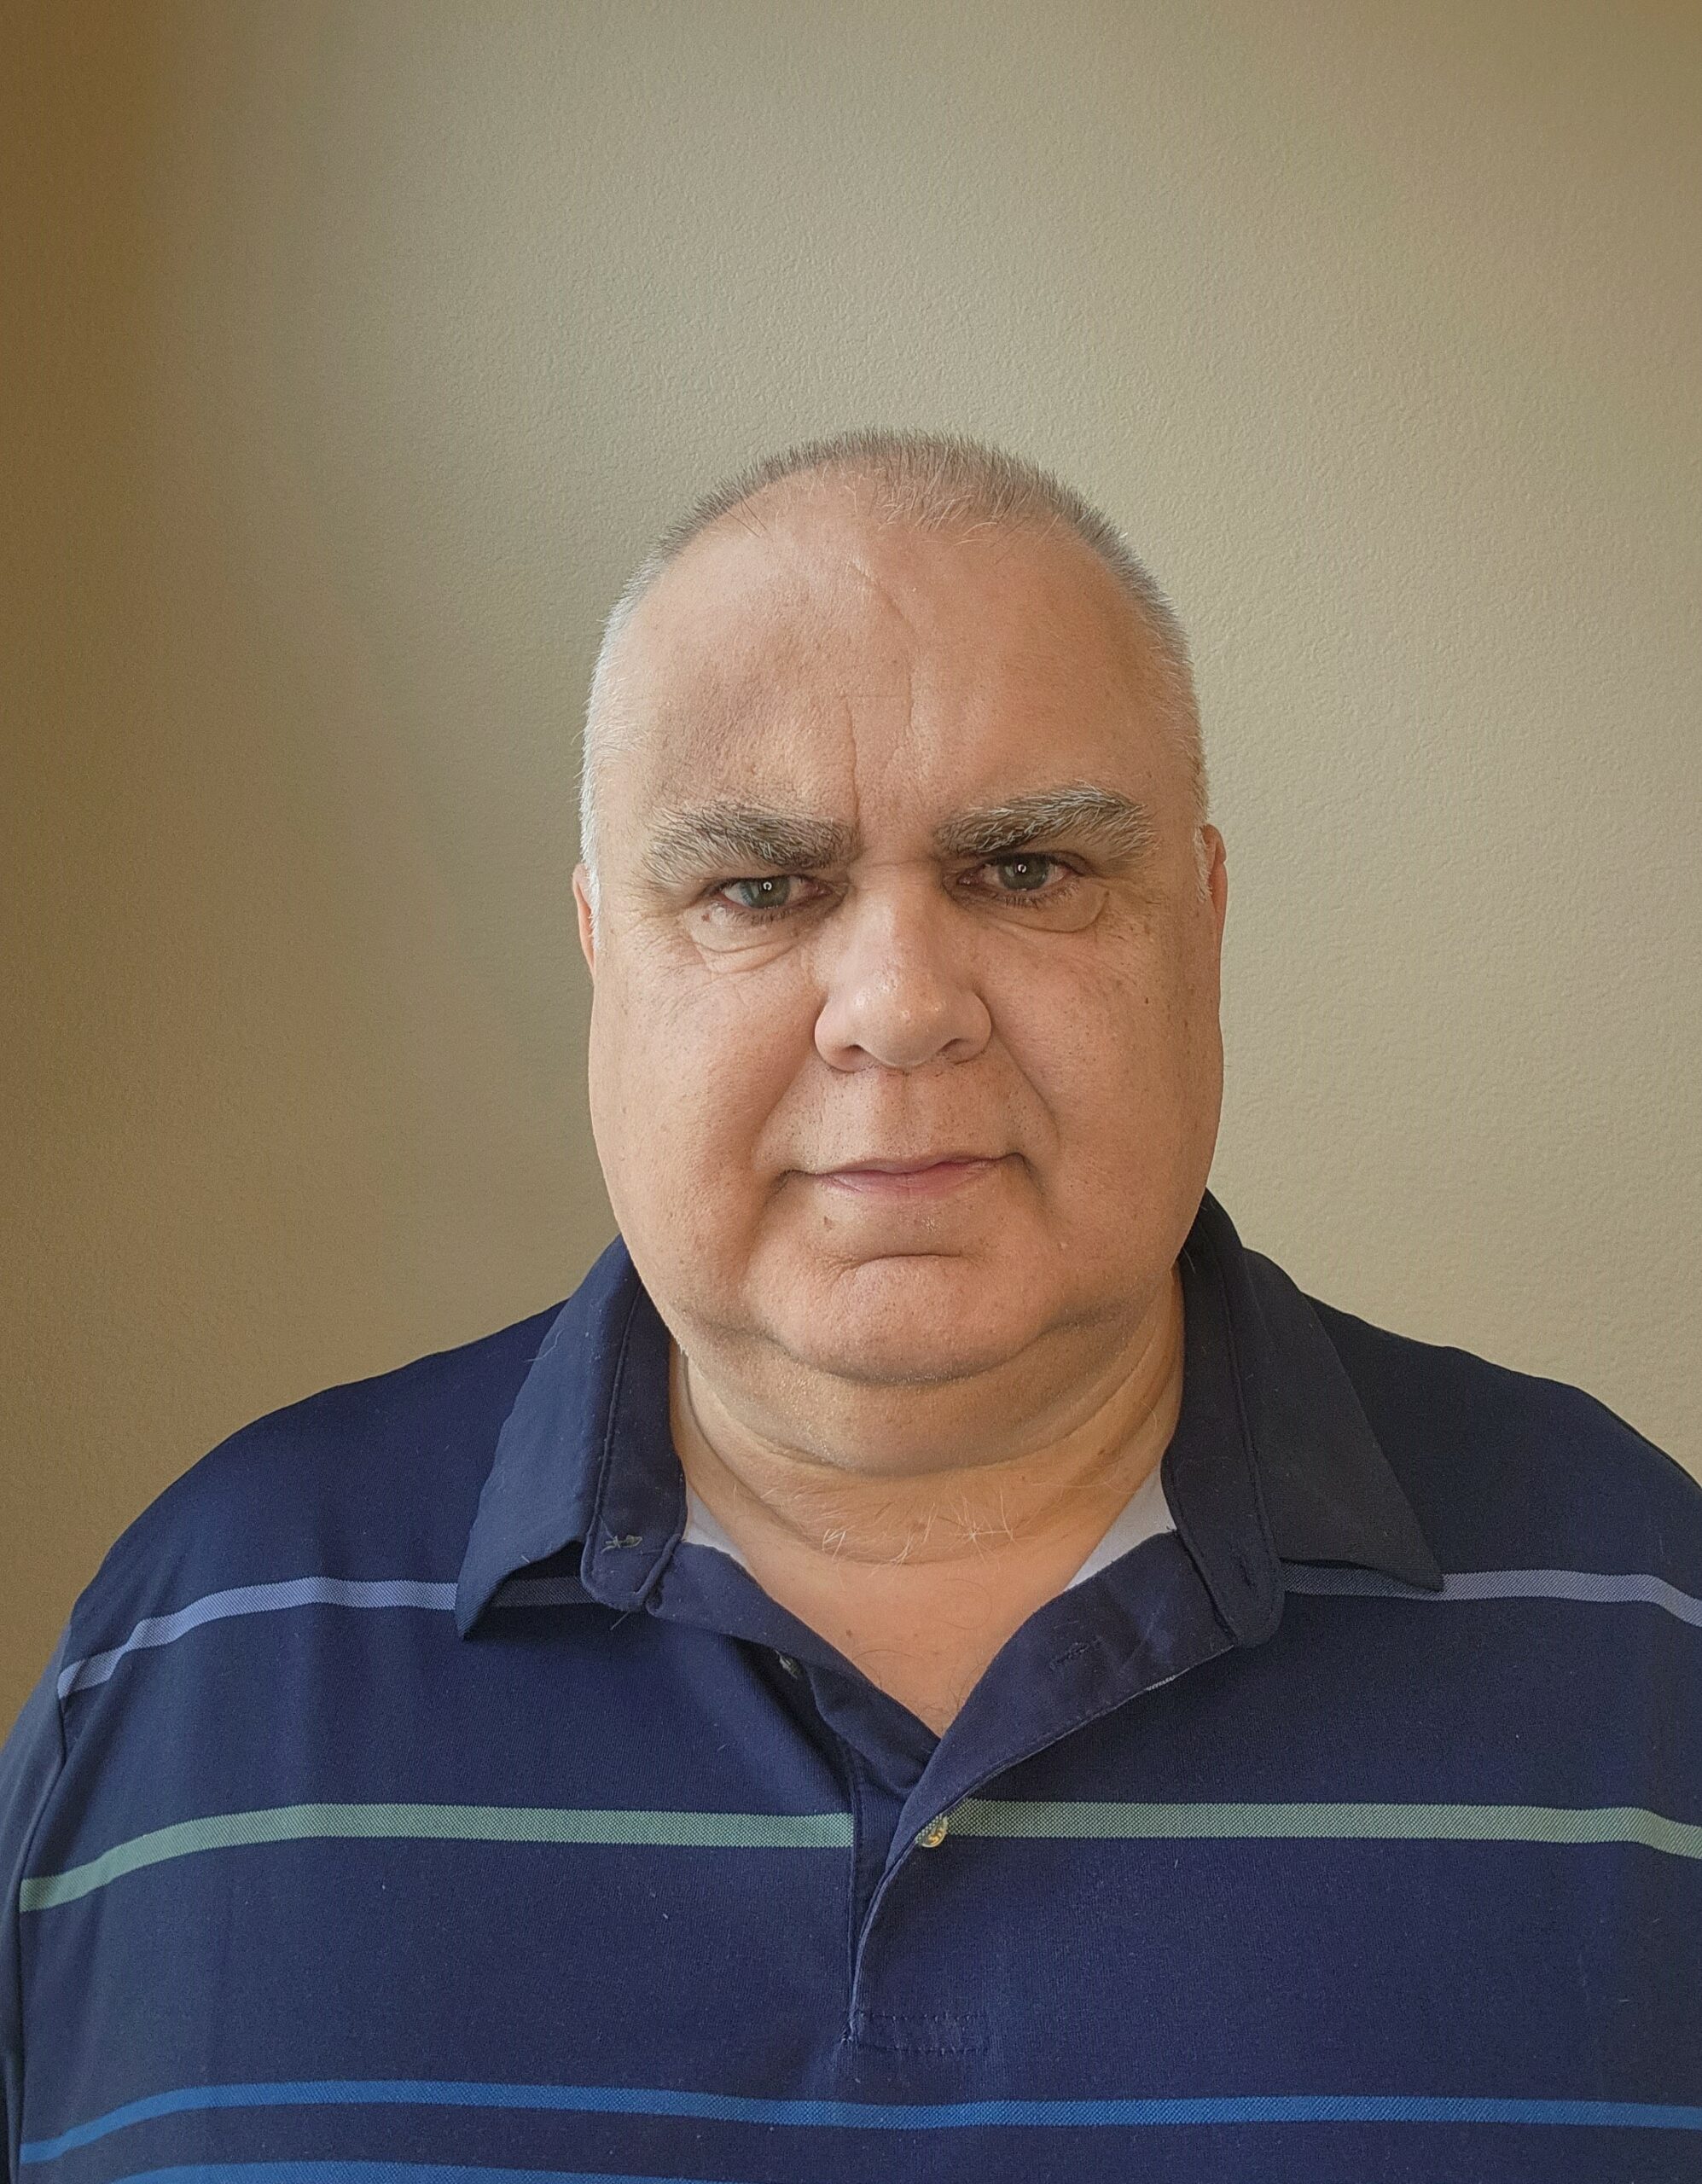
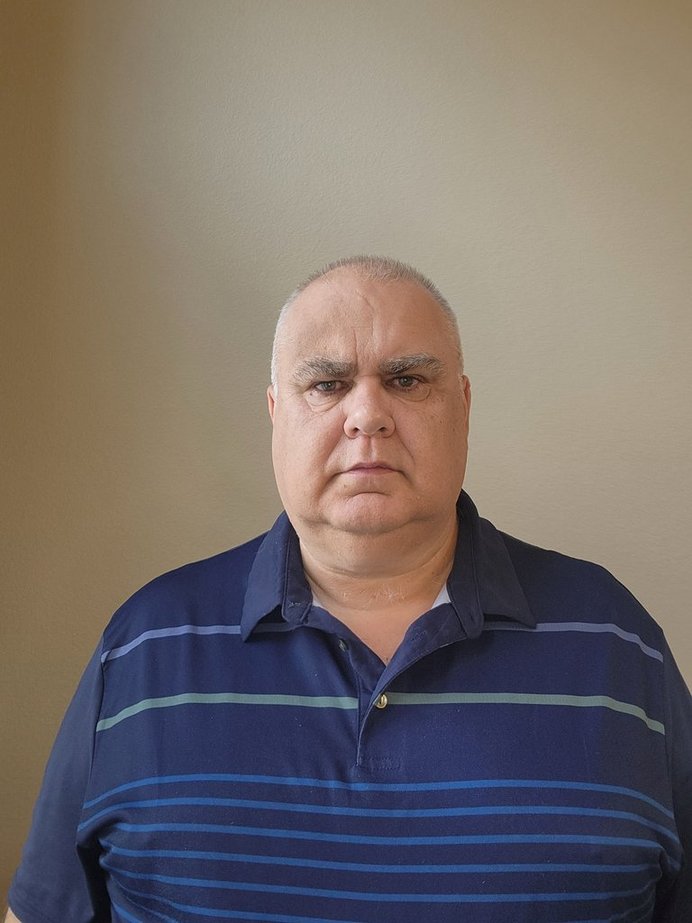
In order to demonstrate a couple on online options I used the following two photos of me that I had created using a cell phone. You can see I found a plain background in my house, BUT the wall is too dark in color so I would not recommend using that photo directly.
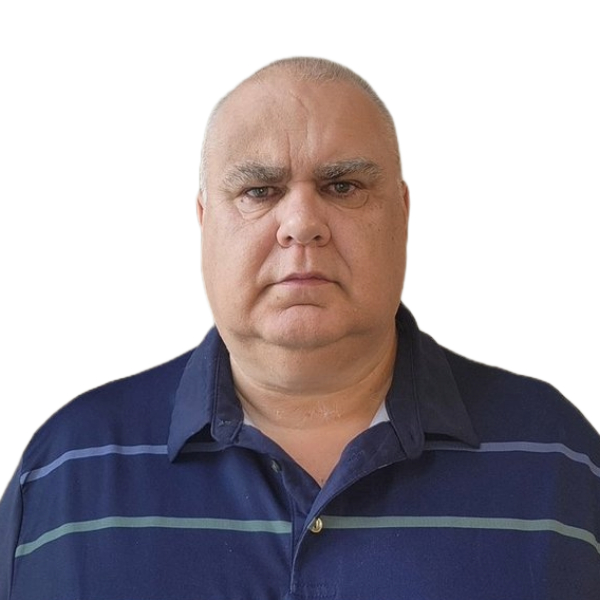
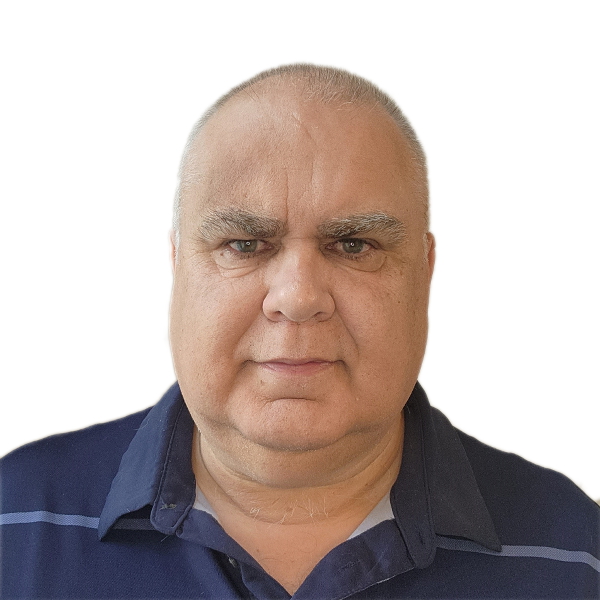
Using these two photos I paid $2.99 to use makepassportphoto.com and $7.00 to use Visafoto.com. These are the results:
Adobe Express/Photoshop edit
Adobe will let you create an account for free and has a certain amount of functionality available. However, it takes some skill to use the tool, and unless you are expert you may get noticeable effects in the produced image when trying to remove the background. For instance, I found the image produced has some flattened area of my hair (as little as I have), which makes it noticeable that the photo has been edited. I would be concerned that this could be interpreted as an alteration of my features, and therefore be a slight cause for concern.
The problem with hair will be a larger problem for those with more hair – especially if the hair is curly. The background could show through the gaps in the hair, OR the hair could be edited out – and either way thise could give concern about the photo being edited.
So, unless you have NO budget at all, or you are not an expert with the tool, I would suggest not using that option.
This seems an acceptable photo and the treatment of the hairline is pretty good. The cost of this services was $7.00 which is not too bad at all.
This also seems an acceptable photo and the treatment of the hairline is pretty good, but I actually find the photo a little more accurate (less softened) and since that is the less expensive service ($2.99), that would be my recommendation.
Here is my video for this same subject:
In summary, I hope this article is useful for you. Please do take this step seriously, as you do not want to have your photo rejected right from the beginning.

September 29, 2023 at 20:05
Hi Brit,
Does the same photo taken for the online application need to be printed and taken into the embassy if you were selected? Or can you take new ones in for the embassy interview?
September 30, 2023 at 10:09
Take a new one later.
September 30, 2023 at 09:03
Hi Simon, thanks for the guide. Some people think that if you change or lighten the background in a photo, even if it doesn’t related to the person’s face, the DV program that checks the photo might say it’s been changed. This could mean the application may be rejected at the initial stage. What do you think?
September 30, 2023 at 10:03
The tools I show both create a new image with meta data that does NOT show any previous versions – so the change is undetectable to the software. And by the way, the state departments own tool does a similar thing, so it is acceptable.
September 30, 2023 at 09:42
Thank you.
What about using a tool download on playstore”DVLOTTERY PHOTO TOOL”
When you snap with you do not need to arrange the measuring 600×600.
What do you think using this?
September 30, 2023 at 10:03
I don’t know that tool – it might be OK.
October 1, 2023 at 05:45
Thank you for the good work sir, my child 1.5 year photo is refusing her photo to be taken i have one with her mouth slightly open (not making faces) eyes are well facing the camera. Is it acceptable?
October 1, 2023 at 11:38
I don’t know since I can see the photo
October 3, 2023 at 23:15
* Sized such that the head is between 1 inch and 1 3/8 inches (22 mm
and 35 mm) or 50 percent and 69 percent of the image’s total height from
the bottom of the chin to the top of the head.
My question is above paragraph. Here in my small town in Afghanistan we don’t access expert photographer, and I submit lottery by myself.
I observe and know all entry process except the above paragraph that you mentioned in your essay, I mean I didn’t find any source to check this one. even every year I check my photo through photo tools in travel.state.gov
I will be glad if you answer my question that how we find that my photo is according the above paragraph as well?
October 4, 2023 at 00:48
The size of your head should be slightly more than half the height of the photo. Look at the examples
October 4, 2023 at 08:49
Hi BritSimon,
I apologize for being persistent, but on the following official website https://travel.state.gov/content/travel/en/passports/how-apply/photos.html it mentions that it’s considered unacceptable when the background is removed using a photo retouching tool. Check Examples > Digital Alterations and Retouching. It appears that this is precisely what those apps do – they remove backgrounds.
October 4, 2023 at 09:53
1. If you read the test properly you will understand that the background removal was mentioned BECAUSE it changed the appearance of the subject.
2. Obviously the ideal is to achieve the white background without editing. But if someone cannot do that then background removal is their only remaining option. If they don’t remove the background they will be disqualified.
Just common sense if you think it through, but I am also using 10 years of experience…
October 6, 2023 at 06:01
Can we put the same photos in wifes and husbands registration pages? Or we need to do 2 photos for each of us?
October 6, 2023 at 09:09
You can use the same photos
October 9, 2023 at 04:08
Thank you for stressing the importance of photos, I think I have made mistakes that resulted in rejection in the past. On your point about ” in DV2024 more than 70% of applications from the AF region were rejected even before the results were announced – so don’t fail in this way!”, where can we find this evidence (link)? Im interested in looking at the rejection rate vs number if applicants. Also, how can one know what percentage of that 70% was rejected specifically because of the photo? Thank you very much.
October 9, 2023 at 16:41
About the numbers of rejections, that isn’t mysterious. DV2024 has 55000 AF region selectees (that includes derivatives). Using the DV2023 derivative rate I estimate that to mean we have about 32865 AF cases. Could be a little more or less.
The highest case number I have heard thus far is AF122XXX for DV2024. So – out of over 122000 original cases, we only have about 32865 left. That means 89000 cases were disqualified from the first 122000 entries as ordered randomly.
We don’t know the split of reasons for the 89000 disqualifications, but photos is the most likely to be the most common if you think about the process.
October 9, 2023 at 18:40
What if the measurements at off by 4 pixels only 604×600? I only realised this after adoptions
October 9, 2023 at 20:43
Then it is not square and should not be accepted.
November 10, 2023 at 08:01
Hi BritSimon,
I noticed that there is a lot of talk around whether changing the background of your photo using Photoshop is allowed or not. I have heard people say that even if the editing does not alter the appearance of the person it is still rejected because the software they use detects if the photo has been photoshopped in any way. So is any of this true? Can they actually detect if the background has been edited and does that have any consequences?
Thank you in advance.
November 10, 2023 at 10:28
Sometimes the metadata for the photo is left intact, showing the photo was edited. So – they might read that metadata.
November 10, 2023 at 15:21
Hi i was a student at roumania and i letf at 2013 do i still need to bring clearance police from the Roumanian autority even i was left the country 10yeras ago ?
November 10, 2023 at 15:27
Yes
November 11, 2023 at 04:16
Even I m not the winner my spouse is the main applican ??
November 11, 2023 at 09:55
Yes. Read the instructions.
November 12, 2023 at 22:13
I checked the properties of the image file and it says the program name is Photoshop cs3. So is this grounds for disqualification? Also is it okay if the upper part of my ears are kind of covered by my hair or do both my ears have to be completely visible?
November 13, 2023 at 16:28
1. Not necessarily.
2. That’s normal.
December 14, 2023 at 05:48
Hello BritSimon, good day to you. I am writing this for nnext dv application for i am not sure if my picture was accurate. My worry is this, i use the dv tool later and it said my picture was over compressed bc it was 14kb and that was after i had played. So is there a minimum KBs of the pictures since it only says it shouldn’t be more than 240kb?. Some people argue it should be 54Kbs. Will i be disqualified or how does the picture disqualification work? Before or after the lottery has been won?
December 14, 2023 at 17:18
14KB sounds too small. I don’t think you could have a filesize that small and still meet the requirements.
January 8, 2024 at 22:45
Hi Mr Britsimon
So, I submitted my photo for the initial DV 2025 Registration. That time I only use the official photo cropping tool on the official gov website. But now that I look at it and realised there is a bit of a thin line slightly in the background (on the left side) if look very very closely and if zoom in on the photo. But overall, without zooming in, it looks fine.
Now, I am worried that this might have throw away my single chance for the year. If I had known about this article on the Britsimon blog, I would have read about the articles regarding the photo then and I would rather pay a few dollars to get a professional photo with white background instead of off-white (Using the online service like visaphoto) rather than worrying for the whole year.
1. What do you think ?
2. Do I just throw away my chance for this year even if I am selected or Its Fine ? Am I right to be worried ?
I am disappointed with myself but Its lesson learnt and I will use a professional photo for the upcoming 2026.
Thank You Mr Britsimon
January 9, 2024 at 00:45
The chance of selection is very low. So – don’t try and overthink this…